
I’d like to introduce my favorite engineering calculation spreadsheet. It’s called “An Engineer’s Toolbox” by AECCafe, and it’s available in both Excel and Google Sheets. What makes this one of my favorite spreadsheets isn’t just the fact that it helps me calculate stresses and strains – which is a major plus – but also because it comes with several different types of joint calculations. For example, if you want to know how much torque will be transmitted through a bolted joint given certain parameters (e.g., bolt diameter, length), this spreadsheet will tell you exactly how much tension or compression stress each bolt will experience during use! Another cool thing about this tool is that it can help evaluate beam stiffness during static loading conditions when combined with information about material thicknesses & modulus of elasticity values for each component used in the design process (see below).
This great spreadsheet helps me calculate stresses and strains in a variety of materials.
This great spreadsheet helps me calculate stresses and strains in a variety of materials. It is useful for mechanical engineering, and can be used to calculate stresses and strains in a variety of materials.
It has built-in formulas for calculating shear, moment, and bending moments, as well as the stiffness of beams.
The spreadsheet has built-in formulas for calculating shear, moment and bending moments, as well as the stiffness of beams. It also contains a table of maximum allowable stresses for various materials (concrete, steel).
You can use this spreadsheet to calculate:
- The maximum allowable stress in a material given its cross-sectional area and thickness
- The maximum allowable stress in a section given its thickness and length
It also comes with several different types of joint calculations – including bolted, riveted, welded, and a variety of solid & lap joints.
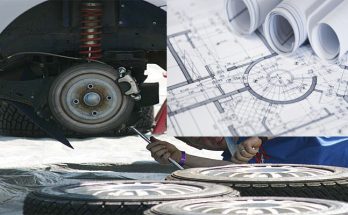
A joint is a connection between two or more parts. In structural engineering, the most common joints are bolted, riveted and welded. A bolted joint involves two pieces that are connected with bolts or studs through holes drilled in them. The holes must be aligned properly so that they do not interfere with each other when tightened down by nuts/bolts on each side of the connection point (see Figure 1).
Riveted joints also require alignment so that rivets are inserted into holes drilled at desired locations along edges of two pieces being joined together (see Figure 2). After inserting them into place with an impact gun or hammering tool such as an air chisel, you then use another piece called a “rivet setter” which holds everything together while you tap each one in place until it seats securely against both surfaces being joined together (see Figure 3). Once all rivets have been driven home successfully and evenly spaced apart from one another around their circumference so they form an even ring around all four sides – this forms what’s known as a secure connection between pieces A & B allowing them not only hold up under stress but also remain stable after repeated cycles during use over time without losing any strength whatsoever!
Welded joints work similarly except instead of using bolts/studs or rivets – we use heat generated from torches which melts metals together at high temperatures until cooled off again later down below room temperature levels where no longer able to melt anymore due lack heat energy available within environment surrounding objects being worked upon currently.”
In addition to all this, it also includes input boxes for various attributes like material thicknesses, loading and support characteristics (e.g., point load or distributed load), etc.
In addition to all this, it also includes input boxes for various attributes like material thicknesses, loading and support characteristics (e.g., point load or distributed load), etc.
To use this spreadsheet effectively, you need to know some basic concepts of stress analysis. First of all, you must understand what a stress is: it’s the force acting upon an area within a body in Newton per square meter (N/m2). Stress can be either tensile or compressive depending on whether the forces are pushing apart or pulling together on an object. In most cases when calculating stresses in beams we will only be concerned with compressive stresses as they tend to cause damage by crushing rather than bending; however it’s still good practice to check both types because there may be exceptions where one type of failure could happen before another due to local conditions such as roughness at contact points where two pieces meet up but no other stress relieving measures were taken during assembly processes etcetera…
My favorite feature is that it provides a table listing values for the maximum allowable stress in each case.
My favorite feature is that it provides a table listing values for the maximum allowable stress in each case. This is extremely helpful when analyzing mechanical systems, because it allows you to quickly see what the maximum allowable stresses are for every member in your system. It also has built-in formulas for calculating shear, moment, and bending moments.
This spreadsheet is very helpful when analyzing mechanical systems.
This spreadsheet is very helpful when analyzing mechanical systems. It provides a table listing values for the maximum allowable stress in each case and has built-in formulas for calculating shear, moment and bending moments.
This spreadsheet is helpful because it allows you to easily see how changing one value affects another value by changing only one thing at a time. It also makes it easier to understand how certain things work together (such as how much force is needed to cause something to break).
This is a very useful spreadsheet that I’ve used on numerous projects. I highly recommend it if you’re looking for a way to analyze mechanical systems and determine their safety.